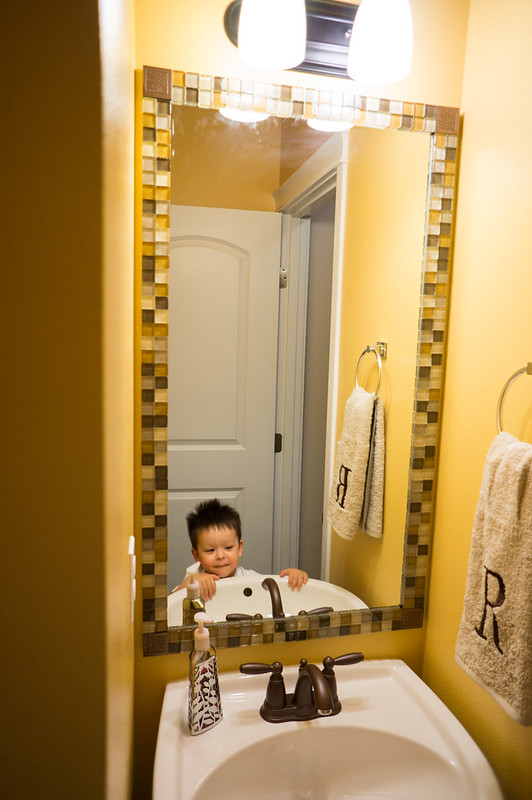
She had an idea to do tiles around the perimeter of the mirror to make it more defined and exciting. We used some glass tiles made for back-splashes. Based on those colors and a general idea of what she wanted, we picked out a color sample. I decided I'd come back and get the paint later after figuring out how much we would need, which was a huge mistake because I ended up getting the wrong color. But it was one top three picks, so it worked out okay. After checking out multiple stores we finally found light globes and shelves that we liked. We had everything we needed to get it going.
The prep work is always the worst. Since our trim and baseboards are all stained medium brown wood, they had to be sanded before I could paint them white. Then came taping everything off and removing the faucets that were to be painted. With all that done I started painting the walls a color called Golden Wheat. Two coats later we were satisfied. I decided then it was best to start on the tile around the mirror. We basically had to cut every individual tile off of the mesh pattern, and used liquid nail to adhere them to the mirror. This took at least four nights just because I had to use tape to hold everything in place while it dried. It came out looking pretty nice though, and hopefully they stay put.
In between the tile work I was able to sand the chrome faucet and prime and paint it with a dark brown metallic paint to give it that more rustic feel. Once that was taken care of, it was time to tackle the trim and baseboards. After some trial and error with different brushes and techniques, Michelle came through and let her painting abilities shine! She showed me what I was doing wrong and how it had to be done. We put a few coats of paint down and then I just had to caulk the seams. The last piece, aside from cleanup, was to re-install all the hardware and put up the shelves. Aside from the cheap wall anchors that always come with these things, it was a breeze.
Michelle placed the final touches and cleaned everything up, and we called it good for now. On to the pics!
Before

After
Before

After

We still have a couple things we'd like to add, like darker floors and some under-shelf lighting above the toilet. But for now we'll call this one done!
Critical lover of your site, a considerable variety of your blog posts have genuinely assisted me out. Hunting in the direction of updates!
ReplyDeleteBathtub reglazing NYC
Bathtub reglazing nj